Jupyterhub offline install- 오프라인 분석서버
인터넷이 안되는 offine Linux 환경에서 Jupyterhub를 세팅하는 방법
1. 계정 설정
jupyterhub를 띄울 계정이 일반계정이 아니라 root라면 하지 않아도 되는 부분이다.
만약 별도 계정으로 띄워야 한다면 pem 설정을 해줘야 한다.
test 라는 계정으로 서비스를 띄우고 실제 유저 (aaaa, bbbb) 가 있을 때 test 계정의 권한으로 aaaa를 로그인 할 수 있어야 하기 때문다.
[사용자계정] 라고 쓰는 것은 내 계정 이름이 abcd 일때 작업창에 “[abcd]” 가 아니라 “abcd” 라고 써야한다.
이번 포스팅에서 약속이다.
“[]” 까지 쓰지 말자..
1.1. group
필요한 그룹은 2개이고 그룹명은 마음대로 작명하면 된다.
1
2
$ groupadd [jupyterhub그룹]
$ groupadd [shadow그룹]
1.2. users
서비스할 계정을 하나 만들고 사용자 계정은 알아서 세팅하면 된다.
1
2
$ adduser [서비스올릴계정]
$ adduser [사용자계정]
1
2
$ passwd [서비스올릴계정]
$ passwd [사용자계정]
1
2
$ usermod -a -G [jupyterhub그룹] [서비스올릴계정]
$ usermod -a -G [jupyterhub그룹] [사용자계정]
1.3. shadow
1
2
3
$ usermod -a -G [shadow그룹] [서비스올릴계정]
$ chmod 640 /etc/shadow
$ chgrp [shadow그룹] /etc/shadow
2. 설치파일 준비
2.2. Anaconda
아래 사이트에서 본인이 사용할 Anaconda 를 다운받는다.
https://docs.anaconda.com/anaconda/install/linux/
https://repo.anaconda.com/archive/
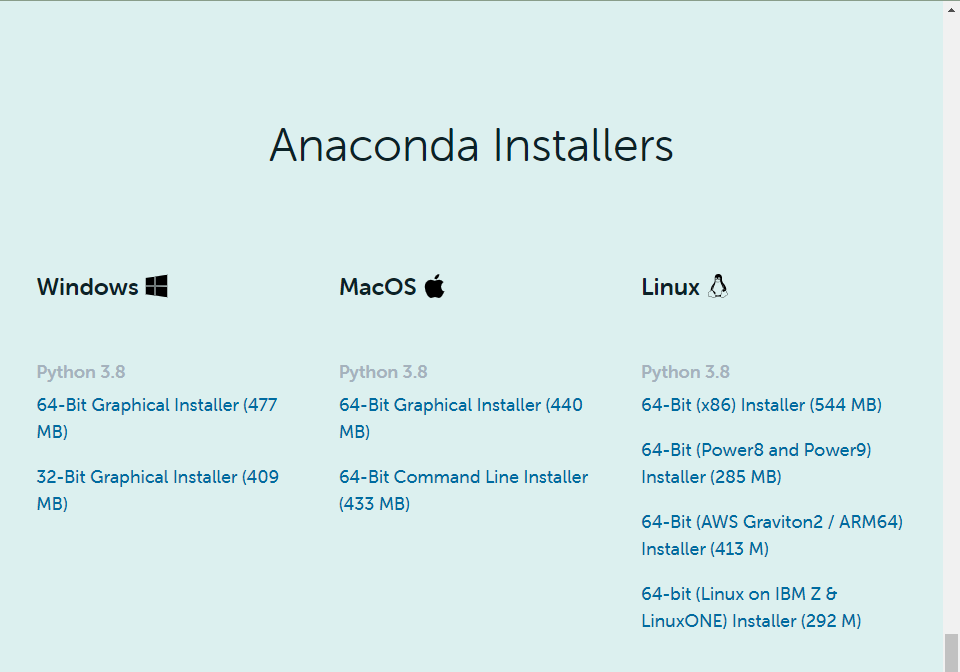
필자는 offline server에 python 3.8로 맞춰야 하기 때문에 오래된 버전으로 받았다.
1
wget https://repo.anaconda.com/archive/Anaconda3-2021.05-Linux-x86_64.sh
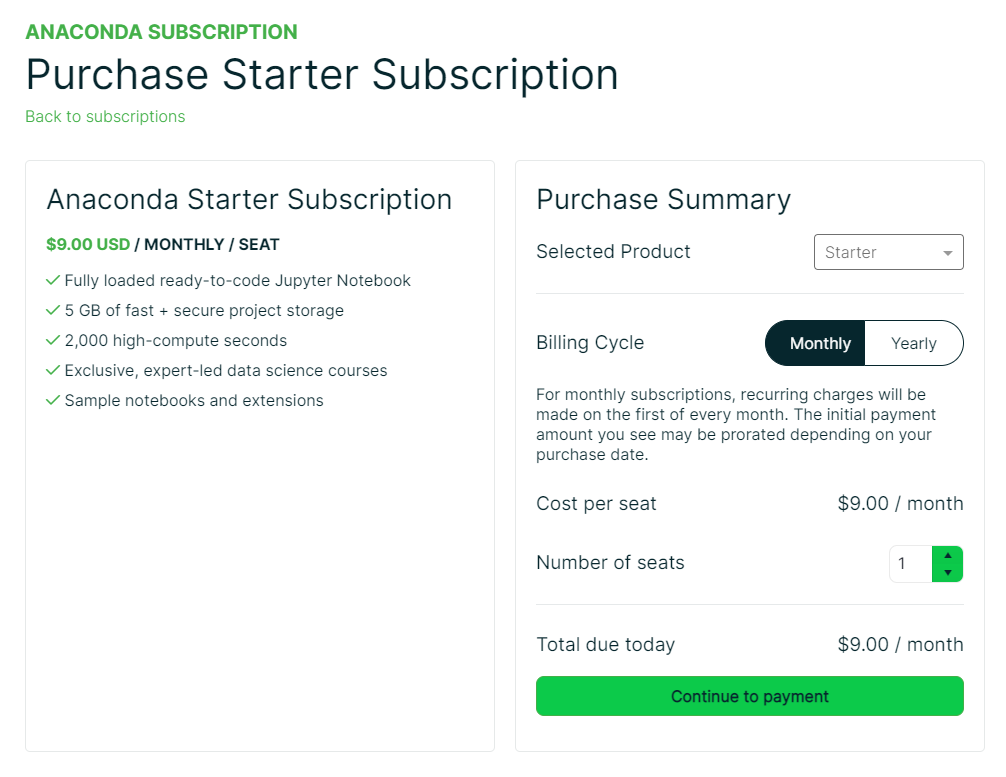
anaconda 정식 라이선스는 200인 이상 기업이라면 돈 내고 써야한다.
만약 라이선스를 구매하지 않았다면 miniconda로 받으면 좋겠다.
https://www.anaconda.com/products/professional
1
2
3
4
5
## https://www.anaconda.com/blog/anaconda-commercial-edition-faq

How do you define commercial usage?

We clarified our definition of commercial usage in our Terms of Service in an update on Sept. 30, 2020. The new language states that use by individual hobbyists, students, universities, non-profit organizations, or businesses with less than 200 employees is allowed, and all other usage is considered commercial and thus requires a business relationship with Anaconda.
2.2. conda packages
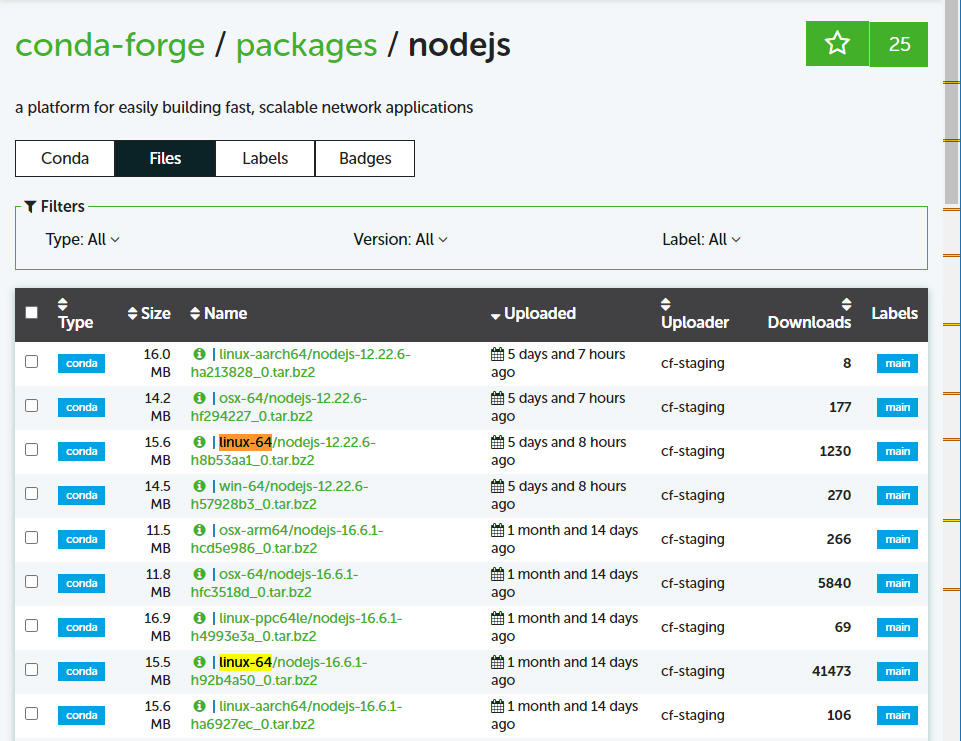
Jupyterhub를 설치하려면 configurable-http-proxy 가 필요한데 이것을 설치하려면 npm 명령어로 설치해야 하기 때문에 Node.js 가 설치되어 있어야 한다.
https://github.com/jupyterhub/configurable-http-proxy
이 부분이 제일 중요한데, “인터넷이 안되는 환경” 이라는 것 때문에 Node.js도 설치하기 어려울 것이다.
다행히 anaconda에서 위 두 파일을 패키지로 지원한다.
아래 사이트에서 “linux-64” 로 시작하고 다운로드 수가 많으면서 어느정도 최신 패키지를 받는다.
글을 작성한 현재 기준 최신버전으로 링크를 걸어놨으니, 만약 버전이 업데이트되면 필터부분에서 버전을 바꿔서 설치하면 된다.
- https://anaconda.org/conda-forge/nodejs/files?version=16.6.1
- https://anaconda.org/conda-forge/configurable-http-proxy/files?version=4.5.0
- https://anaconda.org/conda-forge/icu/files?version=68.1
업데이트 2023-03-01
node: error while loading shared libraries: libcrypto.so.3: cannot open shared object file: No such file or directory
nodejs-18 이상으로 설치하게되면 아래와 같은 에러가 발생할 수 있다.
openssl 1버전이 아니라 3버전이 필요하다.
- https://anaconda.org/conda-forge/openssl/files?sort=ndownloads&version=3.0.8&sort_order=desc
RuntimeError: Proxy failed to start with exit code 127
만약 이런 에러가 뜬다면 nodejs 와 icu 버전이 안맞는 것이다.
- nodejs-16 == icu-68 == openssl-1
- nodejs-18 == icu-70 == openssl-3
또는
1
2
3
4
5
6
7
    package                    |            build
    ---------------------------|-----------------
    configurable-http-proxy-4.0.1|          node6_0         725 KB
    libgcc-7.2.0               |       h69d50b8_2         269 KB
    nodejs-6.11.2              |       h3db8ef7_0         9.4 MB
    ------------------------------------------------------------
                                           Total:        10.3 MB
1
2
3
4
5
6
7
8
9
10
11
12
13
mkdir conda_packages
cd conda_packages


wget https://anaconda.org/conda-forge/nodejs/16.6.1/download/linux-64/nodejs-16.6.1-h92b4a50_0.tar.bz2

wget https://anaconda.org/conda-forge/configurable-http-proxy/4.5.0/download/linux-64/configurable-http-proxy-4.5.0-node15_he6ea98c_0.tar.bz2

wget https://anaconda.org/conda-forge/icu/68.1/download/linux-64/icu-68.1-h58526e2_0.tar.bz2


cd ../
zip -r conda_packages.zip conda_packages
2.3. pip packages
여기서 핵심 포인트는 offline 환경의 os와 python version을 똑같이 인터넷이 되는 환경에 설치해만 내가 설치할 python package의 dependency를 받아올 수 있다는 것이다.
offline ubuntu 이면 online ubuntu를 구하는게 전혀 어렵지 않겠지만..
offline rh 이면 online rh 따위는 존재하지 않으니 offline centos로 대체하면 dependency 문제가 해결된다.
anaconda install path 까지 같을 필요는 없다.
되었다면,
1
2
3
4
5
6
7
8
9
10
11
12
13
14
15
16
17
18
19
20
21
22
23
24
mkdir pip_packages
cd pip_packages


mkdir sudospawner
cd sudospawner
pip download sudospawner
cd ../


mkdir tensorflow-gpu
cd tensorflow-gpu
pip download tensorflow-gpu==2.11.0
cd ../


mkdir torch
cd torch
pip install torch==1.12.1+cu113 torchvision==0.13.1+cu113 torchaudio==0.12.1 --extra-index-url https://download.pytorch.org/whl/cu113
cd ../


cd ../
zip -r pip_packages.zip pip_packages
pip install 이 아니라 pip download 로 해야지 현재 디렉토리에 패키지 파일과 디펜던시까지 다운받아진다.
3. 설치
위에서 준비한 파일 3개를 offline server 에 반입한다.
- Anaconda3-2021.05-Linux-x86_64.sh
- conda_packages.zip
- pip_packages.zip
3.1. Anaconda
anaconda는 jupyterhub를 서비스할 계정으로 설치한다. 꼭 root로 실행하지 않아도 괜찮다.
1
2
$ su - [서비스올릴계정]
$ sh Anaconda3-2021.05-Linux-x86_64.sh
Welcome to Anaconda3 2021.05
In order to continue the installation process, please review the license agreement.
Please, press ENTER to continue
| Do you accept the license terms? [yes | no] |
yes
Anaconda3 will now be installed into this location:
/home/[서비스올릴계정]/anaconda3
- Press ENTER to confirm the location
- Press CTRL-C to abort the installation
- Or specify a different location below
[/home/[서비스올릴계정]/anaconda3] »>
Enter or path (ex: /program/anaconda3)
Do you wish the installer to initialize Anaconda3
by running conda init? [yes|no]
yes
yes 를 하면 ~/.bashrc 쪽에 자동으로 anaconda path를 잡아준다.
bashrc가 아니라 profile에 써주고 싶다면 no를 하지말고
yes를 하고나서 bashrc에서 잘라서 profile쪽에 붙여쓰면 좋다.
1
2
3
4
5
6
7
8
9
10
11
12
13
14
# >>> conda initialize >>>
# !! Contents within this block are managed by 'conda init' !!
__conda_setup="$('/home/[서비스올릴계정]/anaconda3/bin/conda' 'shell.bash' 'hook' 2> /dev/null)"
if [ $? -eq 0 ]; then
    eval "$__conda_setup"
else
    if [ -f "/home/[서비스올릴계정]/anaconda3/etc/profile.d/conda.sh" ]; then
        . "/home/[서비스올릴계정]/anaconda3/etc/profile.d/conda.sh"
    else
        export PATH="/home/[서비스올릴계정]/anaconda3/bin:$PATH"
    fi
fi
unset __conda_setup
# <<< conda initialize <<<
1
$ source ~/.bashrc
위 명령어를 치는 순간 본인 터미널 계정앞에 (base) 가 붙을 것이다.
1
2
3
conda info
python --version
pip --version
3.2. conda packages
1
2
3
4
5
6
7
unzip conda_packages.zip
cd conda_packages

conda install nodejs-16.6.1-h92b4a50_0.tar.bz2
conda install configurable-http-proxy-4.5.0-node15_he6ea98c_0.tar.bz2
conda isntall icu-68.1-h58526e2_0.tar.bz2
3.3. pip packages
1
2
3
4
5
6
7
8
9
10
11
12
13
unzip pip_packages.zip
cd pip_packages

## pip install --no-index -f <dir> <package>
pip install --no-index -f ./sudospawner sudospawner
pip install --no-index -f ./tensorflow-gpu tensorflow-gpu==2.5.0

## torch는 폴더 인스톨로 안되고 하나하나 순서대로 실행시켜줘야 한다.

cd ./torch
pip install torch-1.12.1+cu113-cp38-cp38-linux_x86_64.whl
pip install torchvision-0.13.1+cu113-cp38-cp38-linux_x86_64.whl
pip install torchaudio-0.12.1+cu113-cp38-cp38-linux_x86_64.whl
3.3.1. sudospawner
anaconda 와 관련된 명령어는 전부 서비스계정으로 실행했지만, 이 작업은 root 권한이 필요하다.
PAM 인증과 관련된 부분이다. 이 작업을 하지 않으면 “pamela.PAMError: [PAM Error 7] Authentication failure” 에러가 발생한다.
root가 아닌 [서비스올릴계정]이 [jupyterhub그룹]안에 속해있는 [사용자계정]의 비밀번호를 가져오게 허락하는 설정이다. 사실상 jupyterhub setting의 제일 중요한 부분이다.
1
2
naon /etc/sudoers
## 제일 아래줄에 대소문자 철저히 지키며 작성한다.
1
2
Cmnd_Alias JUPYTER_CMD = <sudospawner path>
[서비스올릴계정] ALL=(%[jupyterhub그룹]) NOPASSWD:JUPYTER_CMD
(%[jupyterhub그룹])는 만약 그룹명이jupyterhub면 이렇게 써야한다.(%jupyterhub)
<sudospawner path>는 보통 /path/anaconda3/bin/sudospawner 에 있을 것이다.
4. jupyterhub 실행
4.1. jupyterhub-config.py
내가 앞으로 jupyterhub의 실행시킬 특정 폴더를 만든다. 다른 계정이 접근하지 않는게 좋다.
1
2
3
jupyterhub --generate-config

nano jupyterhub-config.py
제일 아래 줄이나 위 줄에 아래 내용을 추가한다. 당연히 각자 환경에 맞게 변경해야 한다.
1
2
3
4
5
6
7
8
9
10
11
12
13
14
c.JupyterHub.ip = '0.0.0.0'
c.JupyterHub.port = 8888
c.JupyterHub.spawner_class = 'sudospawner.SudoSpawner'
c.SudoSpawner.sudospawner_path = '<sudospawner path>'
c.Authenticator.admin_users = {'[서비스올릴계정]'}
c.PAMAuthenticator.open_sessions = False
c.Spawner.http_timeout = 90

# 기본은 /home인데 변경하고 싶을 때
c.Spawner.notebook_dir = '/path'

# https ssl
c.JupyterHub.ssl_cert = '/root/jupyterhub/certificate.pem'
c.JupyterHub.ssl_key = '/root/jupyterhub/key.pem'
1
2
3
4
5
6
7
8
9
10
11
12
13
14
15
16
17
18
19
20
21
22
23
24
# idle 컨트롤을 하고싶으면 아래 패키지를 설치하고 config에 추가해준다.
# pip install jupyterhub-idle-culler
import sys
c.JupyterHub.services = [
    {
        'name': 'idle-culler',
        'command': [sys.executable, '-m', 'jupyterhub_idle_culler', '--timeout=3600'],
    }
]
c.JupyterHub.load_roles = [
    {
        "name": "list-and-cull", # name the role
        "services": [
            "idle-culler", # assign the service to this role
        ],
        "scopes": [
            # declare what permissions the service should have
            "list:users", # list users
            "read:users:activity", # read user last-activity
            "admin:servers", # start/stop servers
        ],
    }
]
stackoverflow나 github같은데 보면 “c.authenticator.allowed_users” 도 추가하던데 굳이 안써도 된다. 해당 사용자가 로그인하면 알아서 config에 써진다.
c.Spawner.notebook_dir 를 설정하지 않으면 로그인한 사용자의 “home dir”로 설정된다.
볼륨관리를 위해 특정 path에서만 분석작업을 하게하려면 설정하는게 좋다.
4.2. jupyterhub 실행
이제 진짜 마지막 단계다.
일단 테스트를 위해 한번 기동시켜보자.
1
jupyterhub
브라우저에 ip:8888 치고 정상적으로 동작한다면 jupyterhub 로그 관리를 위해 nohup으로 실행기켜주는게 좋다.
1
2
3
nohup jupyterhub &
## or
nohup jupyterhub >> /path/logs/jupyterhub_$(date +"%Y%m%d").log 2>&1 &
아니면 jupyterhub 프로세스 종료하고 nohup으로 시작하는 쉘 파일 만들어서 사용하면 편하다.
1
nano run_jupyterhub.sh
1
2
kill -9 `ps -ef | grep anaconda3/bin/jupyterhub | awk '{print $2}'`
nohup jupyterhub >> /path/logs/jupyterhub_$(date +"%Y%m%d").log 2>&1 &
먄약 IT 인프라 팀에 업무를 넘겨야 한다면 jupyterhub 를 서비스에 등록하고 요청하는게 제일 편하다.
1
2
cd /lib/systemd/system
nano jupyterhub.service
1
2
3
4
5
6
7
8
9
10
11
12
[Unit]
Description=JupyterHub
After=syslog.target network.target

[Service]
User=root
Environment="PATH=/bin:/usr/local/sbin:/usr/local/bin:/usr/sbin:/usr/bin:/path/anaconda3/bin"
WorkingDirectory=/path
ExecStart=/path/anaconda3/bin/jupyterhub -f /path/jupyterhub_config.py

[Install]
WantedBy=multi-user.target
1
2
3
systemctl daemon-reload
systemctl status jupyterhub
systemctl start jupyterhub
1
2
### systemctl 로그 보는법
journalctl -f